
How to Install Unity 2019
- VOiD1 Gaming

- Sep 15, 2019
- 4 min read
Updated: Oct 7, 2019
This guide provides in-depth procedure for installing Unity onto your PC using Unity Hub. Also get to know How to Install Unity without using Unity Hub from Unity Archive.

Why to make games?
There has never been a better time to start making games. It was tricky in the past to get your hands on professional Game Development tools but now with increasing number of companies providing affordable or absolutely free tools, there is no excuse not to start making Games.
Talking of Game Engines, Unity is one of the leading Game Engines out there with a robust set of tools for both 2D and 3D Games. With Unity, Games can be developed for multiple Platforms at the same time while the beginner friendly UI/UX makes things easier to handle.
To start developing games using Unity follow the proceeding steps to install Unity Software on your PC.
How to Install Unity using Unity Hub
1. Head towards https://www.unity3d.com and click on “Get started”.

2. You will be redirected towards Unity Plan page that consists of Personal, Plus and Pro. Choose your appropriate plan to get started. Here’s how to start using the “Personal” Plan of Unity.
3. Click on the “Get Started for Free" button under Unity Personal Plan.

4. Again click on the “Start here” button under New User Tab.

5. Read the Terms & Conditions carefully and click on “Agree and Download” button.

6. You will be prompted to download Unity Hub. Select your preferred directory to start downloading.

7. Open your Unity Hub Installer and start the setup. Press “I Agree” to continue.

8. Choose your install destination folder and click “Install”.
9. Your installation will begin and upon completion click “Finish” with “Run Unity Hub” checked on.

10. Unity Hub will now open on your screen with a message to activate your Unity License.
11. Click on the “Manage License” button and then Login to your Unity account to activate it.

12. If you are new to Unity Click on the “Create one” to create a new unity account or else login with your existing account to get started.

13. Provide your Email and Password with a unique Username and Full name to continue. Don’t forget to tick the Terms and Condition checkbox and click “Create a unity ID”.

14. One confirmation Email will be send to your associated email you have provided while creating Unity ID. Just click the link in the mail to complete the account creation process.
15. Get back to Unity Hub and click on “Continue” which will redirect you to the “License Management” page.

16. Now you will be able to see the “Activate New License” button enabled. Click on the “Activate New License”.

17. A “New License Activation” screen will popup. Select your Unity Personal Plan and then select your appropriate sub-category and press “Done” button.

18. Now you will be able to see your License information on “License Management” page on Unity hub.
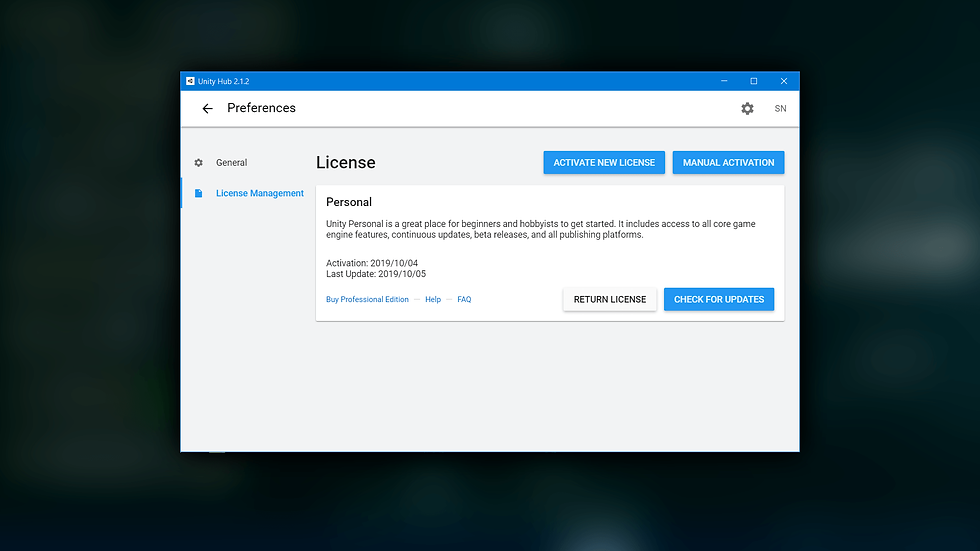
19. Click on the “Back Arrow” button and then head towards “Install” section on the main page.

20. Next press the “Add” button and choose the latest version of Unity and click “Next”. It is always preferable to install Latest Official Release.

21. Now select the “Microsoft Visual Studio Community 2019” under Dev tools, “Documentation” and required platforms you wish to build for.
22. For “Android Build Support” don’t forget to check the “Android SDK and NDK tools” and “Open JDK” checkboxes from the “Android Build Support” dropdown options. Also select the language pack if you wish so.

23. Hit the “Next” button to continue. On the next page check the “Terms & Conditions” checkbox (EULA) for installing Microsoft Visual Studio 2019. Then press “Next” to continue.

24. Again check the “Terms & Conditions” checkbox for Android SDK and NDK support (EULA) and press “Done” button.

25. Finally you will be able to see your Unity installing.

26. After Installation you can find your Unity installed on your PC.
How to Install Unity without Using Unity Hub
1. Head towards https://www.unity3d.com and click on “Get started”.

2. You will be redirected towards Unity Plan page that consists of Personal, Plus and Pro. Choose your appropriate plan to get started. Here’s how to start using the “Personal” Plan of Unity.

3. Now check for the “Older Versions of unity” under “Resources” tab at the bottom of the webpage and click it.
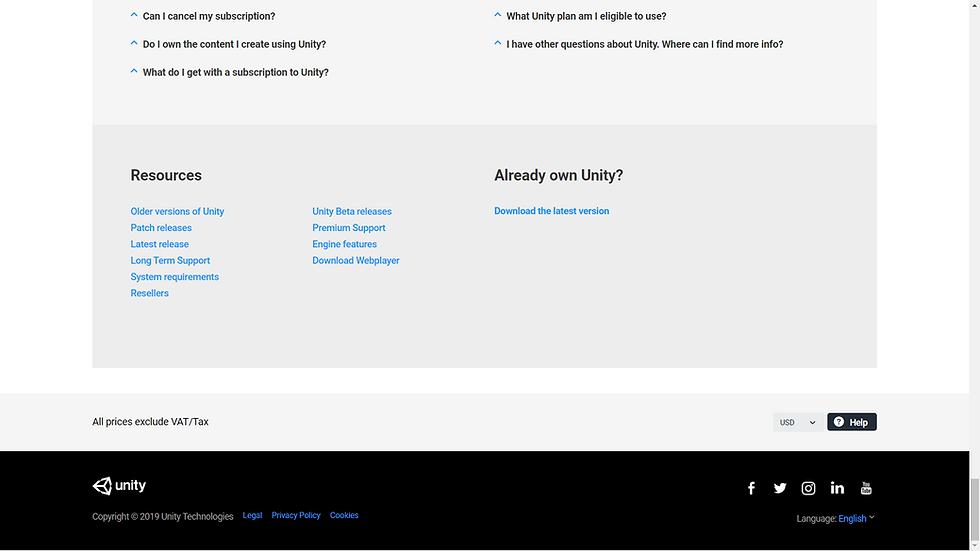
4. “Unity Download Archive” page will open with all the versions of Unity listed. You can see three options to download Unity. Click on the “Download (Win)” or “Download (Mac)” dropdown menu and press the “Unity Installer” option if you don’t wish to download it for the Unity hub.


5. Select your download path and download it.

6. After downloading open the Unity Installer. Hit the “Next” button to continue, check the “Accept license Agreement” and click “Next”.


7. Select all the components you require and press “Next” button.

8. Now choose your installation directory and proceed by pressing “Next”.

9. If you have chosen “Microsoft Visual Studio 2019 Community” from the “Choose Components” page then you have to agree the License Agreement of Visual Studio.

10. Your installation will start now. Unity Assistant will now download and Install Unity, so be in a good Network to download Unity Successfully.

Congratulations!! You have just taken the First Step towards making Awesome Games. Let’s start the journey together!!
With Love from VOiD1 Gaming.
** VOiD1 Gaming is not sponsored by or affiliated with Unity Technologies or its affiliates. All Unity Trademarks from the Unity Trademark List that appear in the site are trademark[s] or registered trademark[s] of Unity Technologies or its affiliates in the U.S. and elsewhere. **


![5 Top Website For Free Game Assets 2D: Part 1 [2023]](https://static.wixstatic.com/media/b03158_3d2a2b2bdf8749c9a18572e9b3c01b7a~mv2.jpg/v1/fill/w_980,h_754,al_c,q_85,usm_0.66_1.00_0.01,enc_avif,quality_auto/b03158_3d2a2b2bdf8749c9a18572e9b3c01b7a~mv2.jpg)
Comments